Gluten-Free Chicken Fingers – Baby Shower and Kid Perfect!
Congratulations Krissy!

Krissy of Krissy’s Creations – photo by Jackie Wonders
This gorgeous mama-to-be is Krissy of the blog Krissy’s Creations. We met baking our way together with a small group of (incredible) bloggers through the Milk Bar cookbook we call Milk Bar Mondays. Together we’ve made some killer desserts, including Confetti Cookies, Apple Pie Layer Cake, Chocolate Chocolate Cookies and Carrot Cake Truffles. I’m always bowled over by Krissy’s creations. Seriously. Check out her Milk Bar Birthday Layer Cake. Her recipes are always featured in such gorgeous colors that befit how beautiful her blog is. She’s so inspiring – I’m wowed by her and can’t wait to see what yumminess will continue to come out of her kitchen.
But today’s a special occasion because a group of Krissy’s blogging friends are throwing her a virtual baby shower! She’s expecting her first child, baby Ezekiel, any day now! Check out her latest post at 36 weeks! The shower today is a surprise, so…
Surprise Krissy!
I’m so excited for you on this next stage of life!

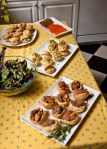
Check out our virtual baby shower feast!
Audra of The Baker Chick | <Mini Salted Caramel Brownie Pies
Averie of Averie Cooks | Cinnamon Oatmeal Date Bars with Chocolate Ganache
Cassie of Bake Your Day | Red Bell Pepper & Ranch Cheese Dip
Erin of Big Fat Baker | Blueberry Punch
Lauren of Keep It Sweet | Baby Blue Cake Pops From Scratch
Nicole of Sweet Peony Blog | Roasted Blueberry Cupcakes with Cream Cheese Frosting
Don’t they all look just delicious?!?
Most of the bloggers brought a dessert to the table. I was totally on board with that. But then I started mulling on a few things…
…any kitchen-savvy mom should have a good chicken finger recipe under her belt…
…I make chicken fingers twice a week for the 13-year old in the family I work as a private cook for…
…I have yet to make myself a gluten-free chicken finger…
…adults like chicken fingers too…
…her husband is a professional baseball player… yup, makes me think of stadium food…
…Krissy loves Sex and the City. At Miranda’s baby shower, her one food request is fried chicken…
…(and, yes, I knew that without having to look it up or even think on it for more than ten seconds)…
Voilà!

I tried this version simply replacing regular Progresso bread crumbs that I use at work with a gluten-free bread crumb I found at the market. But a) not everyone can get them easily and b) they just didn’t kill it for me. I wanted a lighter, crispier crumb. So I found a gluten-free cracklebread that totally did the trick:

Light and airy, it pulsed to a good-sized crumb that didn’t dissolve when the egg-battered chicken was dredged in it, but it wasn’t so fine that it completely coated and crusted on the fry. I bought the tomato version simply because it was on sale. And gluten-free aint cheap.
Adding some basic Italian herbs to the crushed box (which resulted in the perfect amount of crumbs for 1.5lbs of chicken breast), I simply went through the basic steps I use at work and can now do, start-to-finish, in about 20 minutes: remove tenderloin from chicken breast, slice into “fingers”, dredge in (rice) flour, dunk in beaten egg, dredge in crumbs, fry on medium in canola or safflower oil, devour with ketchup and mustard. I originally made chicken cutlets for the kid this way, but was psyched when she bought the finger version – more chicken = more protein = less breading and oil.
So, perfect for a home-made replacement for fast-food chicken fingers, right? I so missed having these that I couldn’t help but snack as I shot. They will be gone by the time this post goes live.
So, congratulations, Krissy. I’m cheers-ing to baby Ezekiel with this kid-friendly classic. And while I hope he never has to deal with gluten intolerance issues, here’s a recipe to have on hand just in case you ever need it.

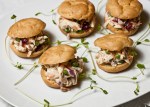
Gluten-Free Chicken Fingers
Makes about 16
Notes: You can substitute any light gluten-free cracker for this cracklebread – I recommend it over toasting and crumbing an actual bread. Play around with the spices as you see fit.
Ingredients:
- 1.5lbs skinless chicken breast (there about… about 3 large breasts)
- 3 large eggs, beaten together in a low, wide bowl
- 1 cup of white rice flour, in a low, wide bowl
- About 100g of a gluten-free cracker or cracklebread
- 1 tsp kosher salt
- 1 tsp dried basil
- 1/2 tsp dried oregano
- 1 tsp garlic powder
- 1 cup (or so) pure canola or safflower oil (or another light oil)
Directions:
In a food processor, pulse cracklebread until it makes a small but not too-fine crumb. Place in a shallow, wide bowl and whisk in salt, basil, oregano and garlic.
Open the chicken breasts to expose the small tenderloin on the side. Slip a filet, boning or chef knife through this tissue to remove the tenderloin. Cut remaining breast into about 4 spears, following cut of meat for easiest shaping. Note: it takes time to get this quickly. Just go with it. It’s just chicken. Make it look like a finger. The size and shape of the chicken breast (often determined by the quality of the chicken) will give you a varied amount. What’s most important is to get the fingers as consistent in thickness as possible so that they cook evenly.
Pour oil into a medium pan (enough to fit 4-5 with space), about 3/4″ high. Put over a medium heat and heat until it just bubbles when you drop a droplet of water on it.
Dredge each chicken piece in rice flour, then egg, then crumb and place on a cookie sheet. (I find it’s easiest to do the flour and egg with one hand and then toss into the crumb with the other, to reduce caking on real human fingers and repeated hand-washing). Repeat with remaining chicken.
Cook each piece in bubbling oil for about 3-4 minutes a side. This will vary depending on how thick your pieces are and how hot the oil is. You want the oil on the low side of bubbling so that the chicken finger has enough time to cook through without getting too dark. Check for doneness by pressing with a spatula – if it’s firm or near to it, it’s done.
Drain on paper towels and serve hot.
Yum!

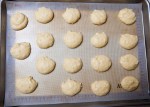
Flat-bread pulsed into in a small crumb.

Chicken. Fingered.

My childhood given back to me at 31-years old.