Dessert

Gluten-free Easter Portuguese Masa

Gluten-Free Portuguese Masa Sovada

This morning I did a happy dance.  Of course I was in the kitchen.I successfully made 4 delicious loaves of gluten and milk free masa, “the bread of my people”!

With a joyful smile my boyfriend joked that I have now become a woman, which in any other circumstance would have sent me into a feminist tirade.  But it is a strange right of passage I am happy to embrace.  My mother, tias, and grandmother all have their recipes for masa, and now I have mine.

Masa is a Portuguese sweet bread made in my family every year around Easter.  For the holiday we wrap the risen dough around painted, hard-boiled eggs and eat them Easter morning.  Scented with lemon, anisette and (in my grandmother’s recipe!) whiskey, it’s eggy and sweet. Recipes all vary in their density; the kind you purchase in stores is usually very light and fluffy.  But my mother’s was always a bit denser, so that’s the kind I grew up appreciating and wanting to replicate.  And because gluten-free breads are generally denser anyway, this was also a matter of necessity.

I’m in possession of three recipes:  my Avo’s (grandmother), my Tia Albertina’s (great-aunt) and my Tia Vidalia’s (aunt).  I’ve made the recipe with my mother, but never attempted to make this bread both gluten and milk free.  And it came out deliciously!

Next week I’ll be trying a slightly different process and doubling the yeast to see if I can achieve a slightly lighter version of the bread, but I am extremely happy with this recipe and recommend it as a gluten-free replacement to this traditional holiday favorite.

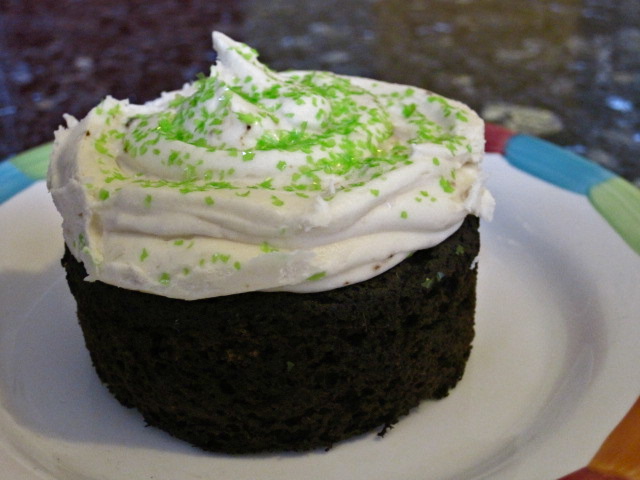
Moist, sweet and eggy gluten-free Portuguese masa

Lots of Notes: I researched a decent blend of flours to estimate a bread flour – because of the proportions I was using, I made 8 cups of flour but only needed five.   I used almond milk but also regular butter, which doesn’t seem to affect my stomach in smaller doses due to the lack of milk protein that’s found in other forms.  If you need it completely dairy free substitute with butter flavored Earth Balance, not shortening.

This recipe is not completely gluten-free because of the whiskey.  Omit if you’re going completely GF.

Also, most recipes call for a lot of kneading because kneading helps to develop the gluten.  So with this just knead until smooth so that your loaves come out a bit prettier than my test loaves did!

Oh, one last thing!  I like to follow my grandmother’s lead and leave these overnight in a warm place.  So I turned my oven on just to 150° and as soon as it was warm turned it off.  I then wrapped my breads in tea towels, then the entire cutting board in a bath towel and put it in the oven overnight.  They rose perfectly and we ready for baking by breakfast!

One last thing, actually!  I didn’t put the eggs in this, but will next week when I make it for Easter.  Literally just prepare your hard-boiled eggs, make sure they’re dry and hide one in each loaf of bread right before baking!

Gluten-Free Masa Sovada

Ingredients

  • 1.5 cup sorghum flour
  • 2 cups brown rice flour
  • 1 cup quinoa flour
  • 1 cup white rice flour
  • 2 cups arrowroot starch
  • 1/2 cup millet flour
  • 8 tsp xanthan gum
  • 1 package yeast
  • 1/4 cup warm water
  • 3/4 cup milk (I used unsweetened vanilla almond milk)
  • 8 Tbsp unsalted butter
  • 3 eggs
  • 1 cup sugar
  • 2 Tbsp whiskey (omit if extremely gluten-free, this has gluten in it)
  • 1/2 tsp salt
  • 1/4 tsp almond extract
  • 1/2 tsp lemon extract
  • zest of 1 lemon

Directions

  • Blend flours, starch and xanthan gum in a large bowl, whisking or sifting thoroughly to incorporate.
  • In a small saucepan melt butter and slowly whisk in milk.  Turn off the heat but make sure this is slightly warm before adding to batter.
  • Dissolve yeast with about 1/4 cup warm water and set aside
  • In a standing mixer with the bread hook attachment, beat eggs and sugar until creamy.
  • Add salt, lemon zest, whiskey, extracts, 5 cups of flour blend and the milk/butter mixture.
  • Mix on low / medium to incorporate, then add yeast. Mix on low until all is incorporated, then bring speed up to medium and mix about 10 minutes or until air bubbles form around the sides.
  • Remove to an oiled bowl.  Cover in clean dishcloths and then a large bath towel or blanket, and remove to a warm place.  Let sit for two hours or so.  Note: Gluten-free breads don’t ‘double in size’ like most breads.  But it should be fluffier after this time.
  • Flour a wooden cutting board or line and flour a non-wooden board.  Shape the dough into four small loaves (or two larger ones if you prefer).  Wrap in towels and let sit overnight.
  • In the morning, remove to thick baking sheets and preheat oven to 300°.
  • Bake for 38 minutes or until only slightly springy on top.
  • Eat AS SOON AS POSSIBLE BECAUSE THEY’RE SO YUMMY!
  • Store remains in plastic wrap and eat within three days.

Curious George’s Banana Nut Bread (gluten-free)

Gluten-free Curious George Banana Bread

So, what if you started giving cool names to baked goods, like Hansel and Gretel Grown-Up Gingerbread or Little Red Velvet Riding Hood Cupcakes?  Maybe you could get a kid into the kitchen?  Enjoy a book with dessert?  I don’t know, I’m just throwing things out there.

This recipe is based on my mother’s Banana Bread recipe, which was one of my favorite things growing up and is still made by my mother and older sister regularly.  I’ve made it dozens of times, but never gluten-free!  So upon a trip home I grabbed (stole) some browning bananas and figured I’d whip up a loaf for my first rehearsal tomorrow.

It ended up being the perfect break in my day as the rain fell outside my windows, making the NYC gray that much more like silver.  The bread came out less dense than my mother’s version, almost spongy and less crumbly.  But boy is it delicious!  Moist and slightly crunchy on top, with nuts sprinkled throughout and a chewy mouth feel.  Next time I’m going to try a different flour blend to see if I can get it a bit denser – maybe some quinoa flour –  but this is one tasty sweet bread!

Yum

Ingredients:

  • 1/2 cup shortening
  • 1/2 cup unsalted butter at room temperature
  • 1/2 cup sugar of choice (I used Sucanat – dried raw can juice)
  • 1 1/2 cup very browned bananas, mushed up
  • 1 Tbsp lemon juice
  • 2 eggs
  • 2 cups gluten-free flour (I used my cake blend)
  • 1 Tbsp baking powder
  • 1/2 tsp salt
  • 1/2 cup ground walnuts (optional)

Directions:

  • Preheat oven to 350°.  Grease a loaf pan and set aside.
  • Combine the flour, baking powder and salt in a bowl and set aside.
  • Cream the shortening, butter and sugar together.
  • Add the banana, lemon and eggs and beat to incorporate.
  • Slowly add flour mixture and beat to incorporate.
  • If using nuts, toss them loosely on a cookie sheet and toast for about 4 minutes, checking every minute, until slightly brown.  Toss them into batter and stir in.
  • Pour batter into prepared pan and press down with a spatula to flatten.
  • Bake for 75 – 90 minutes or until the top is brown and the bread gives a little to the touch.

Fluffy Vegan Frosting


“I’m the most delicious gluten-and-dairy-free Red Velvet cupcake you’ll ever eat.  And now that I’m topped with light and fluffy vegan frosting, that’s so spreadable and pipeable, you’ll never wanna stop making me.  Kisses.”

– Cupake

I swear the cupcake insisted that I write that – I was completely at its mercy.  Maybe because I ate several of his fellows before changing frosting tips to see if I could pipe letters, which I did with ease.

The cake in this cupcake is truly divine – both moist but light, full of cocoa flavor but not too chocolatey.  Several friends who have no gluten or dairy problems could not tell that they are both, one even suggesting I match it up with a gluten-full cake and blind taste test some people for the fun of it.

Please try it, and tell me what you think.  I dubbed it Little Red Velvet Riding Hood Cupcake.  But if you just wanna call it Mmmmm, that’s okay too.  Recently I’ve been calling it “Oh my Dog!”, while it’s still in my mouth.

Now, the only reason I’m reposing this cupcake is because of the frosting issue.  The first I tried was lovely – a sweet vegan “cream cheese” frosting – but it came out more like a glaze, and no amount of whipping or refrigerating gave it a stiff enough consistency for me to pipe or even pile high.

So I tried a Vegan Fluffy Buttercream Frosting recipe from Isa Chandra Moskowitz and Terry Hope Romero and BOY-OH was I happy!  Insanely easy and amazingly fluffy, the frosting stayed stiff enough to pipe with several different tips long after I had colored it and bagged it.  Because it’s made with vegan butter and shortening – which are obviously both vegetable-oil based – it whipped easily at any temperature and functioned well.

And the taste!  Like a classic butter-cream it tastes primarily like sugar and vanilla.  But unlike butter-cream it didn’t taste overpoweringly so.  The shortening gave it enough body so that the sugar content was slightly lower.  Don’t get me wrong – this is very sweet.  As someone who struggles with hypoglycemia, I did a decent job at staying away (after one cupcake of course!)  But it’s not going to overwhelm your taste buds nor distract from the cupcake you put it on.  And because of the light and fluffy consistency, it particularly matched the classy cake underneath it and would do as well with a rich chocolate – ooh, or banana!

Vegan Fluffy Buttercream Frosting

The recipe is from Vegan Cupcakes Take Over the World, by Isa Chandra Moskowitz and Terry Hope Romero.  Click on the title above for their recipe.

This frosting is fluffy and easy to work with

This frosting is fluffy and easy to work with

Having fun with frosting

Gluten-Free Mochaccino Scones

Mochaccino Scones for Share Our Strength

I love having a reason to bake things other than that I just feel like baking.  Or eating.

My roommate works at the Food Network, and tomorrow they’re having an in-office bake sale to benefit Share Our Strength / No Kid Hungry as part of the GREAT AMERICAN BAKE SALE.  My roommate doesn’t really bake.

Hence this post.

I had to figure out something that could be made easily two days in advance since I was once again en transit after Tuesday.  And something that would fairly represent what I try to put in my pastries (or keep out of it) while still providing a pleasurable treat.

So I made a gluten and dairy free version of the Lemon Genmaicha scones I made last week, bumping up the lemon flavor in both the scone and the glaze and adding a few drops of the hazelnut extract I finally found at the NY Cake Company store downtown (if you’ve never been, go). Continue reading

Lemon Scones with Genmaicha Green Tea

Lemon Scones with Genmaicha Green Tea Glaze

Years ago a dear friend in college introduced me to Japanese pearl jasmine tea, and we’d sit in her basement apartment drinking out of delicate cups that released an aroma I had never imagined could exist so closely available at my fingertips.  Over the next few years I started tasting and buying tea like some people buy wine.  I justified the expense because of how healthy this habit is: teas have been shown to provide and help in the absorption of antioxidants, as well as fight certain cancers, reduce blood pressure and help to regulate blood sugar.  And when you’ve been living with a chronic illness, healthy habits are what keep your worst symptoms in remission year after year.

I try, in humble thanks, to use my health in small ways to contribute to the healing of others.  So I jumped on this Online Bake Sale to Help Japan as soon as I got the tweet.  Driving back into NYC yesterday, on a miraculously empty highway, I looked down the Hudson River at the George Washington Bridge a few blocks from my apartment, and was so thankful.  As recent environmental and political events continue to show us, many of our current blessings can be taken away from us in mere minutes.

So my contribution to this online bake sale is inspired by those who have been displaced by the earthquake, tsunami and nuclear threat in Japan, and the tea that has, over the years, contributed to my health. Continue reading

Lavender Tea with Lemon Macarons – A Tea Party for a Cause

Lavender Tea with Lemon Macarons

The absolute best thing about my recent blogging endeavors – other than baking delicious things on a regular basis and then getting even more personal with them by photographing and writing about them – is online community sites like FoodBuzz that connect bakers and bloggers with fabulous causes and the companies that fund them.

This recipe was inspired by Kelly’s Tea Party for a Cause. “Electrolux and Kelly Ripa are proud to support the Ovarian Cancer Research Fund whose mission is to fund research to find a method of early detection and ultimately a cure for Ovarian Cancer. Electrolux has committed to donate $750,000 to this worthy cause.” (From Kelly Confidential website).

Ovarian cancer is a tricky one for us ladies.  The symptoms are mild and often mask as other non-cancer related issues.  There is no effective screening test.  And while science and early detection are improving the survival rate, this form of cancer is still a real and dangerous threat: “…ovarian cancer is the leading cause of death from gynecologic cancers in the United States and is the fifth leading cause of cancer death among American women.  The National Cancer Institute estimates 21,850 women will be diagnosed with ovarian cancer in the United States in 2010 and about 13,580 women will die from the disease.”

I am a featured publisher on FoodBuzz, and for every Tea-Party recipe created by a featured publisher, FoodBuzz will donate $50 to the Ovarian Cancer Research Fund! Thank you, FoodBuzz! This recipe/post will also be eligible for FoodBuzz Top 9 Tea Party Takeover on Friday, March 25th, where 9 of the most delicious posts will be feature on the site.

Please go to Kelly Confidential, and take one minute to select your dresses and tea set for an online tea party! Every time you do so, Electolux will donate $1 to the cause.  This is a great thing to do with a little lady in your life!

Lavender Tea with Lemon Macarons

I’ve had a blast playing with recipes for this event, and when my fifth batch of French Macarons came together last night, I knew I wanted this to be my submission.  Laced with subtle lavender and tart lemon, these are the perfect little delicate treats to balance on dainty fingers and follow with a cup of tea. And they’re naturally gluten-free and dairy free (depending on the filling), so they’re a treat for those of us with food intolerance.

Now macarons are tricky.  This was my fifth and most successful try.  Check out my blog posts on A Cup of Macaron and French Macarons Take One for tips on what did not work and what improved dramatically.  What I’ll stress here is to let your egg-whites sit for at least 24 hours, covered with a paper towel, at room temperature.  This will help some of the water evaporate and the protein build.  Also, when whipping egg whites, start on low and increase the speed, and do not overwhip.  You want stiff peaks but a glossy batter.

Ingredients

  • 2 egg whites, at room temperature
  • pinch of cream of tartar
  • 1/4 cup white sugar
  • 3/4 cup almond flour
  • 1 cup powdered sugar
  • 2 Tbsp dried lavender
  • zest of 1/2 lemon
  • 4 drops yellow food coloring gel
  • Filling: I used a pre-made lemon curd from Ina Garten, but I suggest using her recipe if you have the extra time.  It’s spot on.  And I love her.

Directions

  • Pulse the almond flour and powdered sugar until blended, then sift twice to make sure all larger pieces of almond are separated out and the flour is blended well.
  • Add the lemon zest and lavender to the flour and set aside.
  • Pulse the white sugar in processor until very fine.
  • In the large bowl of a standing mixer or by hand, start whipping egg whites until foamy.
  • Add a pinch of cream of tartar, and whip until soft peaks form.
  • Reduce speed to low, and add the fine white sugar one tablespoon at a time.  When fully incorporated, increase speed to medium and then to high, and whip until stiff-peaked.  Timing varies on this, and this is where practice makes perfect.  Add your food coloring gel when almost completely done whipping.
  • Sift 1/3 of the flour into the egg and fold in completely.  Repeat until all the flour is incorporated.  You want to fold in until the batter is smooth, but still light.
  • Spoon into pastry bag fitted with a large tip (I use between 1/2 and 1 inch, depending on what I grab first).
  • Pipe 1 inch rounds onto parchment lined baking sheets, pulling the tip to the side so as to not leave a peak mark.  I use very thick sheets for this recipe.  Double up if needed.
  • Tap the pan somewhat assertively on the counter to remove any trapped air and help batter to settle.
  • Let sit for 1/2 – 2 hours, until a shell forms on the top and your finger pressed lightly doesn’t leave a mark.
  • Now, bakers are completely split on the right temperature for baking macarons.  Some bake slowly and cooly at 270-350 degrees.  I tried to keep my temperamental oven at around 300 for these, holding the door slightly ajar with a spoon.  This way I can keep them in longer to assure that the insides are cooked without browning them on top, which happened with a batch that was drier / baked higher.
  • Bake in fully preheated oven for 5 minutes, turn the pan, and bake for around 8 minutes more, or until the “feet” of the macaron are a bit sturdier than soft.
  • Cool on sheets for two minutes, then remove to rack to cool completely.
  • Fill with prepared lemon curd and refrigerate to harden.
  • Serve at room temperature with tea.  Preferably wearing a skirt.  Or at least barefoot.

Please click here to be directed to Kelly's Tea Party for a Cause

Lavender Tea with Lemon, Please: A cup of Macaron.

Le Macaron - I have almost conquered you

I’ve come up with several alternative blog post titles for my recent culinary experimentation:

Egg Whites Are The Enemy

Pardon My, Um, French?

and my favorite

Manhattan Macaron Murder Mystery

Anyone who’s tried to make these little bits of delight in their kitchen has most likely failed at least once.  And if you are one of those rare people without professional culinary training that perfected the art of the macaron on the first try, please come over and play with me.

Macarons are notoriously difficult to make.  Which means that they’re the perfect challenge for when I’m in the mood to make something complicated that claims all of my attention.  Usually I’m in this mood when I’m chewing on something.  Figuratively, I mean.  I find nothing more calming then browsing recipes, coming up with a game plan, pouring some cheap red wine into an inherited crystal punch cup, and folding almond batter into whipped egg whites.  And tonight I’m chewing.

So I decide to go for broke with both bowls of egg whites I’ve had out “relaxing” since yesterday morning.  I have two baking events coming up, and while I’ve let myself get down to the wire with my recipes, I’m very excited for the combination of a tea-themed event and an online auction to benefit Japan.

But, oops, I don’t have parchment!  Off to the grocer’s.

Ends up, there is no parchment paper to be found in Washington Heights.  Evidently tamales and chile recipes don’t call for it.  So I grabbed a roll of waxed paper and hoped for the best.

And, yes, there is a HUGE difference between the two.  I’ve learned.  But what can you do?  My philosophy is “making a mess into mmmmmmm”, so I’ve gotta stick by my dusty ways and make do.

And I made macarons!  Tinted a delightful spring yellow, pumped with the scent and light flavor of lavender tea in the macaron shell and with a tart lemon curd filling.

I also made a lemon macaron with fresh zest to be filled tomorrow with a lavender buttercream filling.  Not quite as close to “there” as these, but getting there.

What is working more and more with each test batch?

  • The amount of whipping that produces the perfect “stiff peaks” that are neither too marshmallow-y nor overbeaten and borderline dry.
  • Both processing and sifting the almond flour / confectioner’s sugar.
  • Folding the almond flour in three batches, sifting each time.
  • A properly heated oven: I discovered starting around 350 degrees then dropping the heat and holding the oven door open with a wooden spoon worked perfectly.

Now I’m extra excited to take a macaron baking class with my lady friends and buying the right equipment to make this process easier.

Recipes / details / better photos to come!

Congratulations to Blogger PINAY IN TEXAS

Happy 2-Days to St. Patrick’s Day!

A few weeks ago I entered an Irish St. Patrick’s Day Recipe contest on FoodFrenzy.  THANK YOU to all who voted.  My Irish Cream Filled Carob Cupcake recipe came in second, and this beautiful recipe for Almond & Pandan Sapin-Sapin from Pinay in Texas Cooking Corner came in first.

It’s a gorgeous recipe, one that I can’t personally make for myself because of the necessary condensed milk, but one that I’d gladly make for those without dairy allergies.  And it contains glutinous rice, which I’ve been itching to try.

Please check out her recipe for a lovely story and pictures of her green-tinted, shamrock-delight!

Almond & Pandan Sapin-Sapin from Pinay in Texas Cooking Corner

Pink Swan Cupcakes

Coconut Cupcakes with Pink Swan Icing

My roommate is a big movie buff, so she throws a (small) Oscar bash every year, and stylishly serves up food to go along with each nominated Best Picture.  To throw my contributions in, I made Irish Cream Filled Carob Cupcakes (for the Fighter, set in Massachusetts, which is all I could come up with) and these light and fluffy coconut cupcakes that I frosted pink and sprinkled with dried coconut, to elegantly mock the hot pink mess of a birthday cake that almost dies an early death in Black Swan.

Yes, the Oscars were two weekends ago already.  But I’ve been busy.  And I just finished watching the Fashion Police Oscar episode, which put me back in the mood to post these.  And I shamefully admit that, thanks to my roommate, I now watch that show when it’s left it on the DVR for me.  It’s probably the worst of the shows that I’ve picked up (infrequently) from living with her.  But they DID pick Natalie Portman as the “Best Dressed” of the night, so I can justify the “love” part of “love-hating” the show.

Oh, for the antithesis of my love for Natalie Portman in this film / in her Oscar dress and this pink, girly cupcakes, check out Black Swan Pie at Bittersweet Blog.

Now, these are completely gluten-free.  And I also made them completely dairy-free because I had some Earth Balance sticks in the fridge and was making a coconut cream frosting, so figured why add dairy in the mix if I didn’t need to?

I love gluten-free baking because it is relatively easy to play with ingredients and get a tasty result – the absence of gluten makes doughs tougher.  Which, yes, is what you DON’T want as an end result in certain recipes but which does give you more structure when experimenting.  The only reason I didn’t go completely vegan is because of how important eggs are when baking gluten-free: you’re already using a large amount of starch in the flour blend, so replacing eggs with potato starch and water (essentially that is what egg-replacer is) results in a grainy pastry that crumbles easily.  Rather simply to remedy when making a treat with, let’s say, almond butter or some sort of fat to help, but not so easy with cupcakes.

You could, of course, substitute regular flour in this recipe for the gluten-free mix, sugar for the xylitol and milk and butter for the non-dairy components.

Oh, and I based this recipe off one from Garret of Vanilla Garlic.  I must say, the specific technique produced a fluffy and delightfully almost chewy cupcake.  Paired with a rich coconut frosting that I played with until it was right, these were a hit.

Ingredients: Cakes

  • 12 Tbsp Earth Balance Vegan Buttery Spread at room temperature
  • 3 eggs at room temperature
  • 2 1/4 cup gluten-free flour (I used the high-protein mix)
  • 1/2 cup sugar
  • 3/4 cup xantham gum, sugar or sweetener of choice
  • 1 tsp salt
  • 1 tsp xantham gum
  • 1 tsp baking powder
  • 1/2 cup dried unsweetened coconut
  • 1 cup canned coconut milk
  • 2 tsp vanilla extract

Directions

  • Combine the dry ingredients in one bowl, and the coconut milk and vanilla in another
  • In a third, large bowl, cream the Earth Balance until fluffy, then add the sugar and xylitol and beat until smooth and fluffy
  • Add the eggs one at a time, beating thoroughly between additions
  • Start with dry and end with dry.  That is, add 1/3 cup of the dry ingredients and beat until incorporated.  Then add 1/2 of the coconut milk and repeat until all ingredients are blended
  • Fill into 18 cupcake tins
  • Bake for 23 minutes or until a toothpick inserted comes out clean
  • Cool completely before glazing

Ingredients: Coconut Glaze

  • 1 can of creme of coconut (different than coconut cream)
  • 3 cups powdered sugar
  • 1/2 cup tapioca starch

Directions

Now, I learned through this recipe that there is, indeed, a difference between coconut cream and cream of coconut.  I was thinking that I had bought coconut cream, which is essentially a thicker coconut milk, with a higher fat content.  When in fact I had bought cream of coconut, which is a gel-like liquid that’s been sweetened with sugar.  Not having time to go out and correct my mistake before guests came over, and recognizing that this was simply another dusty opportunity, I blended the ingredients together to produce a delightfully thick glaze.  Now, this is not a frosting I, as a person who has hypoglycemia, will eat because it is all sugar (as frostings tend to be).  But since the cakes were not particularly sweet, this was a perfect companion.  And the coconut flavor came out that much more so in the glaze and therefore brought it out in the cakes.  Success!

Irish-Cream Filled Carob Cupcakes

Gluten-free Irish Cream Carob Cupcakes

Have I mentioned that I love St. Patrick’s Day?  Well, I LOVE St. Patrick’s Day! Hence the little green background that I’m sporting this month even though it really doesn’t work with the color scheme I’m playing with.  Which, if you stop on this site somewhat regularly (thank you, by the way!) you’ll notice keeps changing because I’m indecisive and not the best at settling on colors.  I painted my last bedroom four times and was still never satisfied.  Come to think of it, I change my mind all the time about online everything.  I used to edit my online dating profile every time I went on the darned thing.  Thank dog that I now have this site to obsess over instead and actually met the best man ever so I’m out of that world.  But maybe I’m getting a little too personal.  Back to St. Pat’s.

Every year I spend it feasting with friends, listening to good Irish punk music and drinking Guinness, which I rarely let myself do (I think the last one I had was during the World Cup in July).

This year I’m starting early, preparing some allergy-alternative options for the little shindig I’m hosting.  A few days ago I made Gluten-Free Irish Soda Bread, which made me do a little happy dance.  And the other night my roommate had some friends over to watch the Oscars, which was the perfect time for me to play with an allergy-friendly alternative to the Irish Car Bomb Cupcake recipe I’ve made for the past few years.  I’m still going to make it for the pals who are coming over for St. Pat’s (in case any of you are reading this, I’m not only going to stuff you with healthier options), but frankly, I want a treat I can eat!

So this recipes uses carob instead of chocolate (primarily), gluten-free flour and can be made completely dairy-free by using butter flavored Earth Balance instead of the unsalted butter I used.  I’m still playing with sugar alternatives (I’m not a fan of using agave syrup and xylitol can be a bit rough on my stomach… the experimentation for this hypoglycemic continues!) so powdered sugar made its way into the frosting and organic sucanat into the cake.  The result was a dense carobey-chocolatey cupcake with a nice bang of whiskey to it.  The buttercream frosting is just delicious and overall the amount of sweetness between cake and frosting was in perfect balance for me.

Ingredients

For the cake:

  • 1 cup unsweetened almond milk, soy milk or Guinness (if you’re not worried about the gluten)
  • 9 Tbsp unsalted butter or butter-flavored Earth Balance
  • 2 Tbsp instant coffee
  • 1 cup carob or cocoa powder
  • 2 eggs
  • 4 tsp vanilla extract
  • 1 cup unsweetened almond milk (another second cup from the first)
  • 2 cups gluten-free flour (I used the High Protein Blend from Rebecca Reilly)
  • 2 tsp xantham gum
  • 3 tsp baking soda
  • 1 cup sucanat or brown sugar

For the filling:

  • 2/3 cup chocolate soy butter
  • 2 tsp instant coffee
  • 4 Tbsp Irish whiskey (or to taste)
  • 2 tsp vanilla
  • 2 Tbsp unsweetened milk (almond, soy, rice)

For the Frosting:

  • 14 Tbsp unsalted butter at room temperature (or butter flavored Earth Balance)
  • 3 cups powdered sugar
  • 1 Tbsp vanilla extract
  • 1 tsp ground instant coffee or espresso
  • 3 Tbsp Irish whiskey

Directions

Preheat oven to 350 degrees.  Prepare 20 cupcake tins with liners or use these nifty mini-pannetone liners I found at a baking supply store.  Using these will make your cupcakes a bit squat but they’re pretty when frosted and SO easy to use.  For the actual St. Pat’s party coming up, I’ll be using metallic green liners in regular tins.  Oh, what a fun world we play in!

Set a large saucepan over medium heat and add the 1 cup of milk-alternative or Guinness and butter, let butter melt and whisk together.  Whisking constantly, add coffee and whisk until dissolved.  Remove from heat and then slowly add carob or cocoa powder, and whisk together until completely incorporated.

In a medium bowl, sift the flour, baking soda, xantham gum and sugar.  In a second bowl, whip the eggs until light and foamy, and then add vanilla and 1 cup of almond milk or milk of choice.  Whip until creamy.

Slowly pour the egg/milk mixture into the chocolate mixture, whisking continually until well blended and no dark traces remain.

Fold in the flour mixture until just fully incorporated.  Fill cupcake liners equally, and bake at 350 degrees for 22 minutes or until a toothpick inserted in the center comes out clean.  Remove to cooling racks and cool for about 10 minutes before filling.

To make the filling, place all ingredients in a medium bowl and beat with a hand mixer until smooth.  Taste test – if the flavor of the whiskey is too strong for you, add a bit more soybutter and almond milk.  Put mixture in a pastry bag or one-gallon plastic bag and cut a small hole in one corner.  Make a small slice in each cupcake and fill with as much chocolate-whiskey frosting as you can!

For the frosting: Place the whiskey, vanilla and instant coffee in a medium bowl and whisk to dissolve the coffee.  Add the butter and, using a hand mixer, beat until smooth.  Progressively add the powdered sugar until fluffy and light.  Ice half of the cupcakes with this white icing, then add a few drops of green food coloring and beat to incorporate. Have fun decorating!  I used edible glitters – one opaque and one light green, and some coloring gels.  A small container of the glitter lasts FOREVER and creates a shimmery touch.  Fun fun.